
SUNLU PLA Temperature: Nozzle and Bed Settings
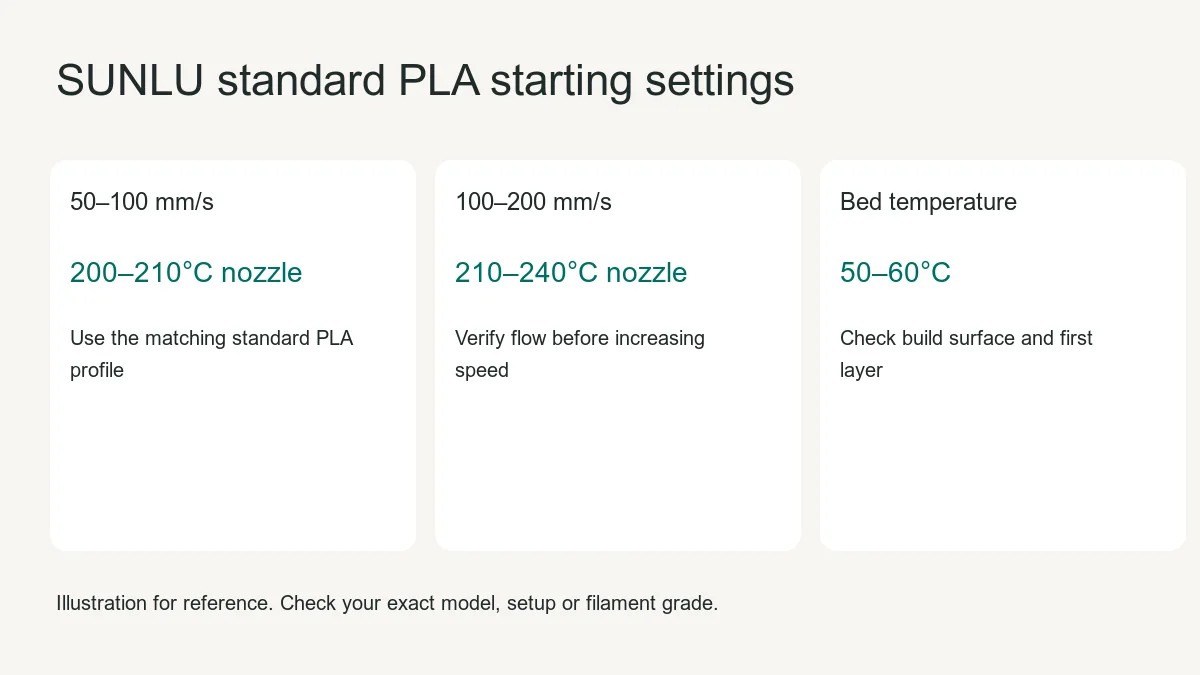
For SUNLU standard PLA, the manufacturer’s product page lists 200–210°C at 50–100 mm/s or 210–240°C at 100–200 mm/s, with a 50–60°C bed. Check the grade on the spool label first. If the spool says PLA+, PLA Classic, High Speed PLA or another variant, use the manufacturer’s settings for that exact grade.
For SUNLU standard PLA, the manufacturer’s product page lists 200–210°C at 50–100 mm/s or 210–240°C at 100–200 mm/s, with a 50–60°C bed. Check the grade on the spool label first. If the spool says PLA+, PLA Classic, High Speed PLA or another variant, use the manufacturer’s settings for that exact grade.
What do these settings control?
PLA is the plastic filament on the spool. The nozzle melts it and lays it down in thin lines. The bed is the platform where the first layer sticks. The two temperatures control different parts of the print, so change one at a time when testing.
SUNLU PLA print settings by speed
| Setting | SUNLU published reference | How to use it |
|---|---|---|
| Nozzle at 50–100 mm/s | 200–210°C | Start within this range for a modest-speed sample. |
| Nozzle at 100–200 mm/s | 210–240°C | Confirm the printer and profile can handle the intended flow before increasing speed and temperature. |
| Bed | 50–60°C | Match the build surface guidance and inspect the first layer. |
These ranges come from the SUNLU standard PLA product page. Treat them as starting settings. Nozzle size, layer height and line width affect how much material flows at a given speed. Two profiles at the same displayed speed can therefore need different settings.
Check which SUNLU PLA you actually have
Look at the spool and box labels for the full grade, SKU or barcode and lot number. A listing that only says “SUNLU PLA 1 kg” can leave the exact version unclear. If a technical sheet shows a different grade or a range that does not match the product page, ask which document applies to the label on your spool. Keep the matching document with the approved sample. SUNLU’s manufacturer product catalog separates material variants and illustrates why the grade matters.
How to test nozzle temperature with a small print
- Start with a known setup. Use the correct printer profile, a clean compatible surface and a spool that turns freely. Check the first-layer height before changing temperature.
- Choose one speed range. At 50–100 mm/s, a 205°C nozzle and 55°C bed are midpoints within SUNLU’s published ranges and reasonable trial values for the verified standard grade. They are starting points, not a measured optimum.
- Print a small test part. Keep speed, cooling, layer height and line width fixed. Look at first-layer adhesion, surface finish, strings between features and layer bonding.
- Change one setting. If comparing nozzle temperatures, keep the bed and other settings fixed. Run the same part or a properly configured temperature tower. Record the actual temperature for each segment. If the issue is confined to the first layer, examine the surface and Z distance before changing nozzle temperature.
- Confirm on the intended part. Repeat at the chosen settings on a representative geometry. If you later raise speed or change the nozzle, validate the result again.
Diagnose the symptom before raising temperature
| Symptom | First checks |
|---|---|
| First layer lifts or individual lines are loose | Check plate cleanliness, Z distance and bed setting. Verify that extrusion is continuous. |
| Lines look weak or intermittent at higher speed | Check spool feeding and the nozzle, then reduce speed and retest within the matching temperature range. |
| Excessive strings | Check material handling, travel and retraction settings. Compare a lower nozzle setting within the published range while holding other variables constant. |
| Surface changes after opening a new carton | Compare grade, color and lot. Repeat the same test under the same handling and profile before attributing the change to temperature. |
Record the settings for bulk replenishment
For each approved sample, record the SKU or EAN, color, lot, spool dimensions, printer, nozzle, plate and slicer profile. Add the nozzle and bed temperatures, print speed and pass criteria. When the shipment arrives, compare the labels and reel version, then rerun the same part on a sample from the shipment. That gives your team a consistent basis for evaluating spool fit and print results across orders.
Worked example: a standard PLA sample at 80 mm/s
For a confirmed standard PLA spool, 80 mm/s falls within SUNLU’s 50–100 mm/s reference band. Begin at 205°C nozzle and 55°C bed as a trial. Print a small part with a flat base and two separated features. Inspect first-layer adhesion and the travel area between the features. If you change nozzle temperature, keep the bed, profile and sample geometry unchanged so the result is comparable.
Keep the first layer separate from a speed test
If the first layer is loose, verify the surface and nozzle distance before increasing nozzle temperature. If the first layer looks good but later lines become thin at higher speeds, return to the previously working speed and retest. Record the temperature and the actual speed profile. A result at one speed band is not evidence that the same settings work at the next.
Use a simple batch comparison record
For a sample or replenishment spool, record grade, barcode, color, lot, spool width, nozzle and bed settings, profile name and test result. Keep one photo of the label and one of the print. Compare those records if a new roll behaves differently. Ask the seller for the applicable technical sheet when a label or version changes.
View standard PLA purchasing details · Check first-layer height on the V3 SE